5 Steps to Setting Up Notifications in the Endometrix App
Brain fog be damned! Custom Notifications are now available within the Endometrix app to help you remember to track your endometriosis and overall health throughout the day.

The User Interface (UI) design of Notifications is a work in progress, so we wanted to break down how to turn them on, customize them, edit them, and delete them.
Step 1: Turn Notifications On
To turn on Notifications, go into the settings view within the app. From there - right under your name - you will have the option to switch Notifications on or off.

Step 2: Tap On Notifications Bar to Set Up Multiple Custom Ones
To add multiple Notifications, tap on the Notifications section after turning them on. This action leads you to a separate view where you can switch your Notifications on or off all together at the top, or individually under “My Notifications.” Also in the "My Notifications" section, you can add as many Notifications as you'd like by pressing the + button.

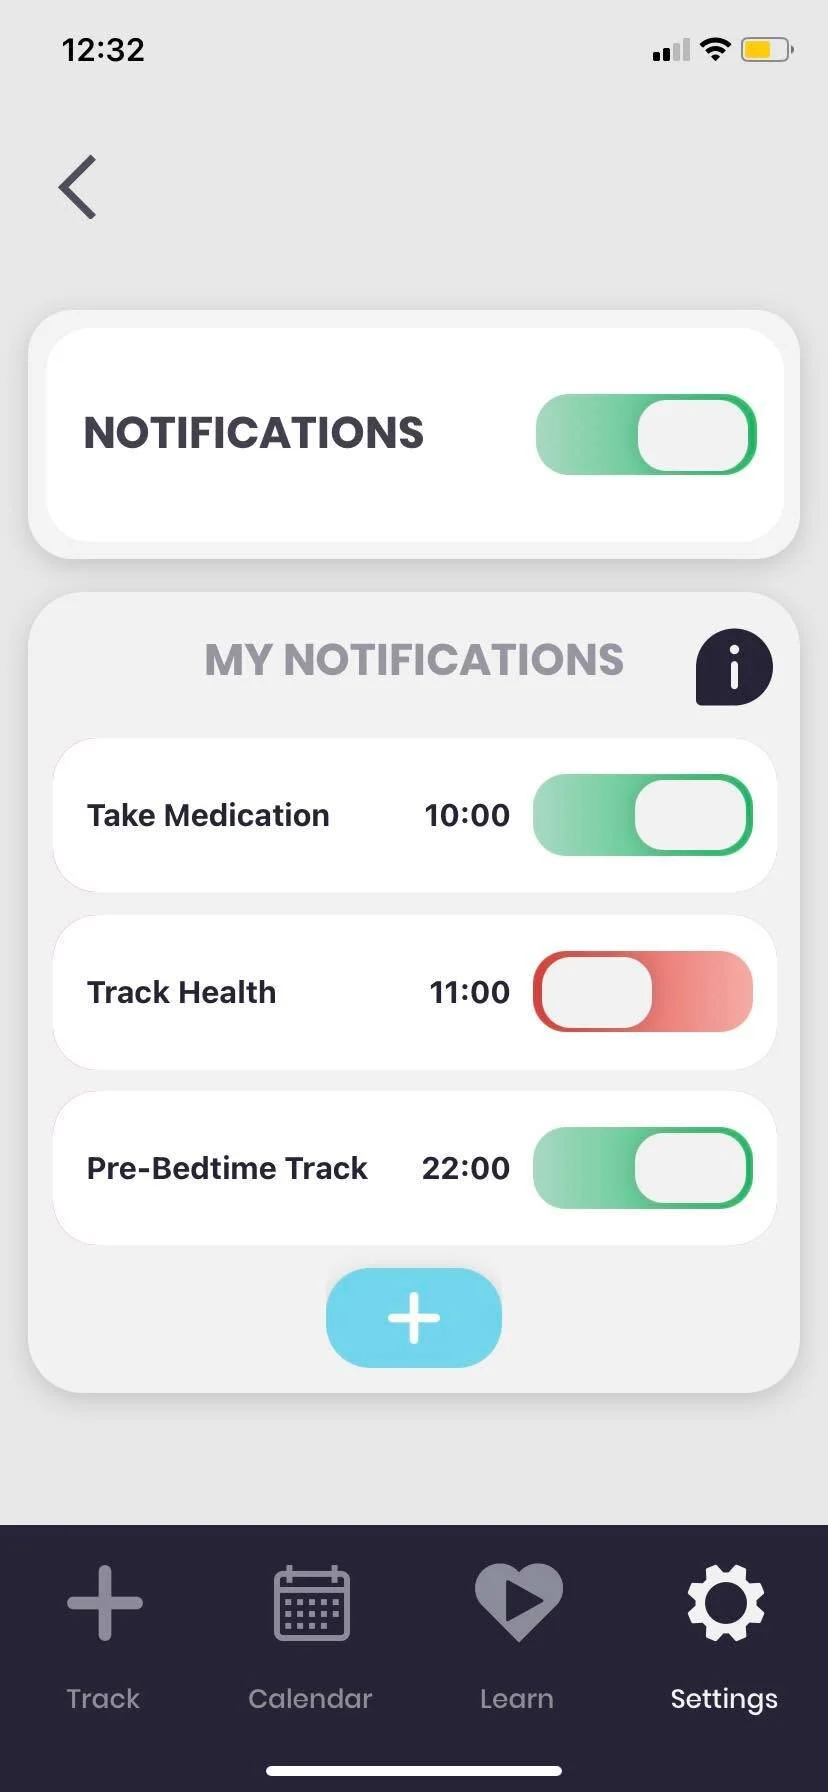
Pressing the + button leads you to a view where you can give your Notification a unique name like "Take Medication" or "Track Before Bedtime." You can also choose any time you'd like these Notifications to occur.


Note: the keyboard blocks your ability to either tap the orange submit button on the left or the pink cancel button on the right. Once you're finished with naming your Notification, click the Return button on your keyboard for iOS or the Return or Back button for Android to hide your keyboard.

Once you have named your Notification, tap the orange check on the left side of the screen to save it. If you want to cancel the Notification, tap the pink X on the right side of the screen.
Step 3: Edit Your Notifications
If you'd like to change the name or the time of a Notification, press down on your chosen individual Notification, then swipe it to the left like you do with fuckbois (or girls) on Tinder.
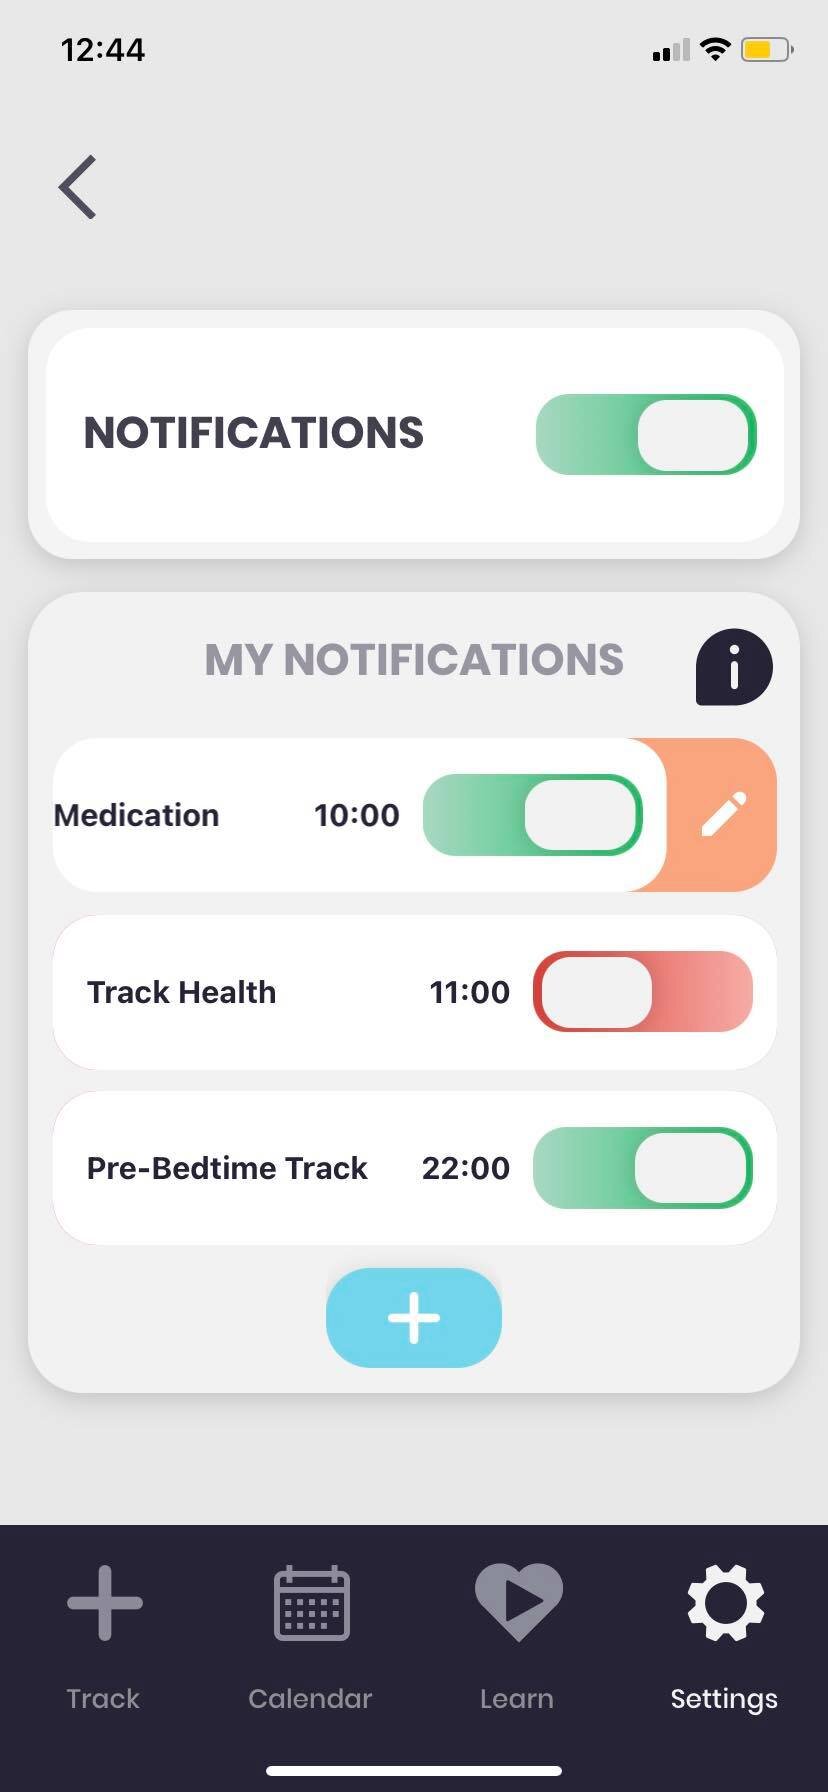

An orange pencil will pop up to the right of the Notification. Tapping on this orange pencil leads you to the editing view where you can change the name and the time of the Notification.
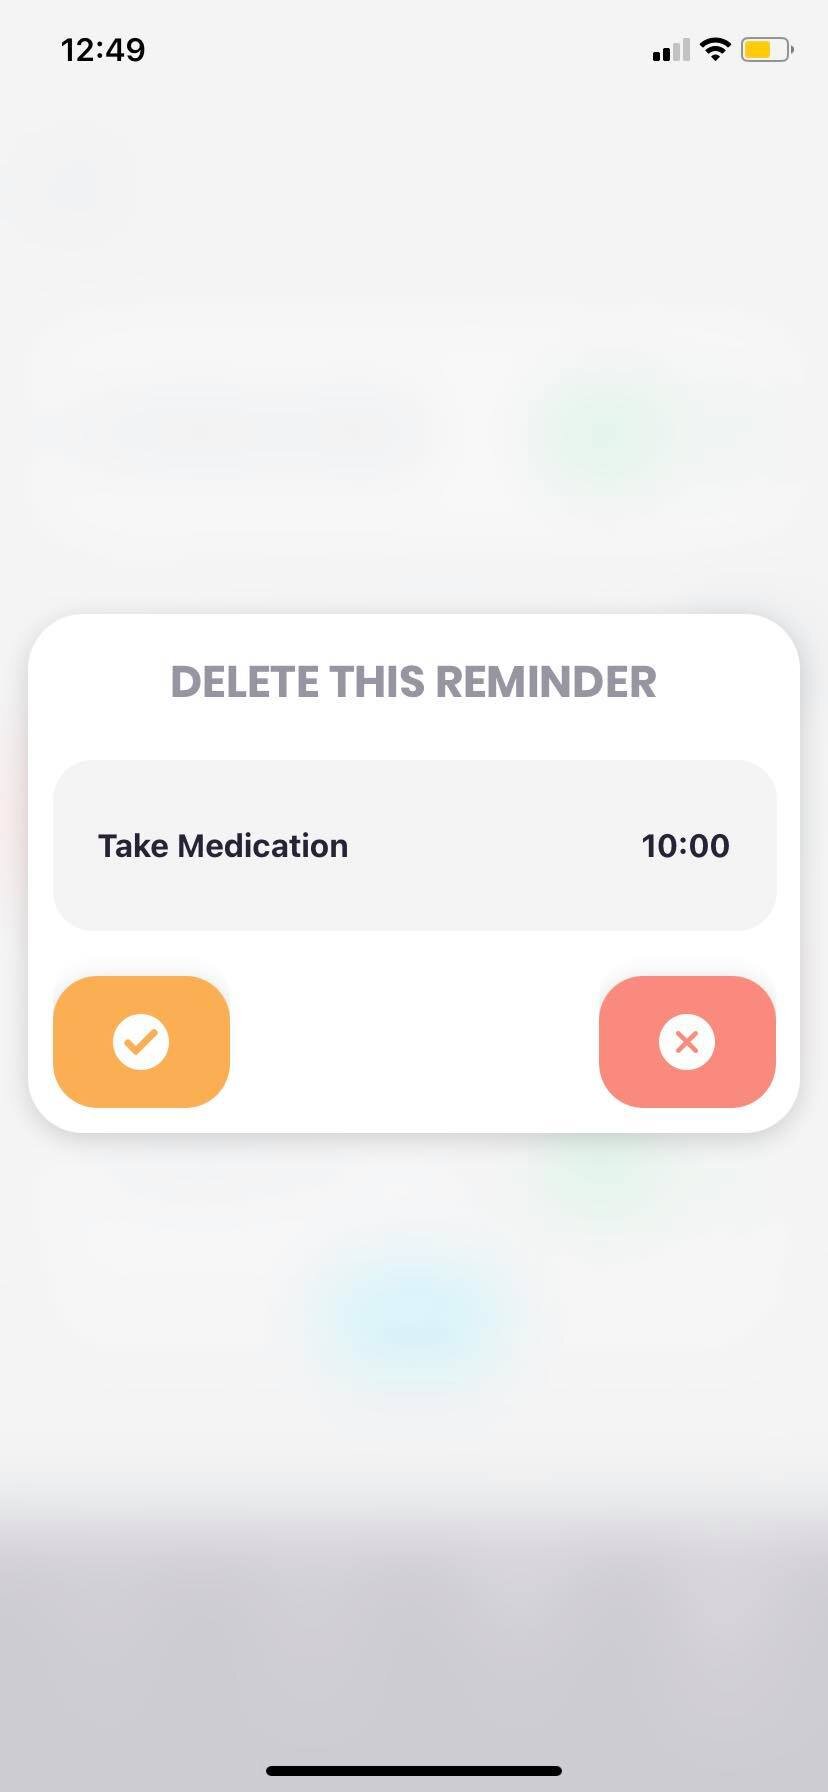
Step 4: Delete Your Notifications
If you'd like to delete a Notification, press down on your chosen individual Notification, then swipe it to the right like you do with your dream partner on Tinder. A pink trash bin will pop up to the left of the Notification. Tapping on this pink trash bin leads you to the delete view where you can tap on the orange check to confirm your deletion or tap on the pink x to cancel your deletion.

Step 5: Leave Us Feedback
We know that this feature, while desperately needed, isn't as great as it possibly could be. Therefore if you feel like something is missing from making your Notifications experience best for your needs, let us know! You can submit your feedback in the app within the Settings view, or you can send an email to brittany@endo-metrix.com!
For additional information about our app’s features, functions, and how we created it, visit our How Our App Works page.